Orienteering at Alley Pond Park

Looking to take on your next nature challenge? Check out our new orienteering course at Alley Pond Park! Explore winding paths that lead through towering forests, tranquil ponds, and scenic spots that offer the splendor of nature, fresh air, and a chance to meet wildlife in our city.
If you're new to orienteering, check out our Orienteering at Parks page to learn more about this incredible map sport.
Stay safe: please remember to wear a face mask, practice social distancing, avoid poison ivy, and stay safe from tick bites.
Navigating Alley Pond Park's Orienteering Courses
To complete a course, you’ll need to find all the locations, called control points (or controls), on the map in numerical order (1, 2, 3, 4...) from start to finish.
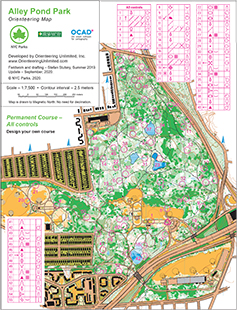
On this page, you may download a course map with controls, their sequence numbers, codes, and descriptions.
1. Pick one of the Alley Pond Park Orienteering Course Maps
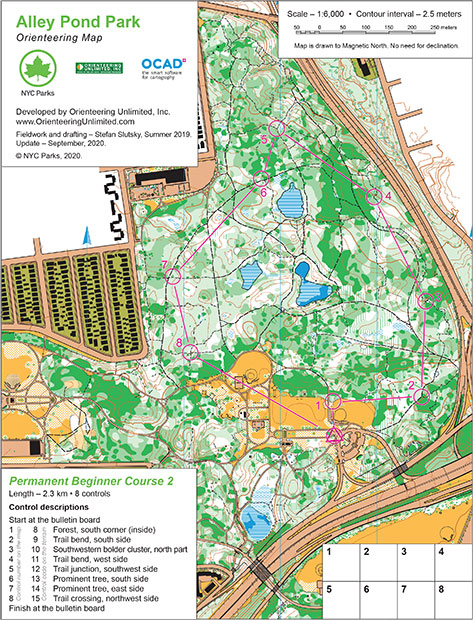
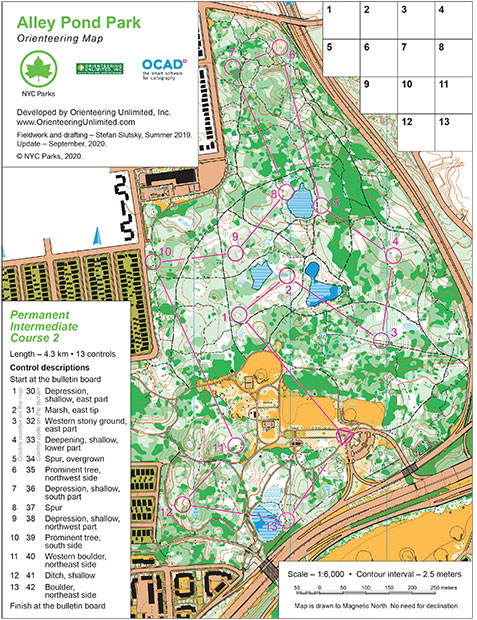
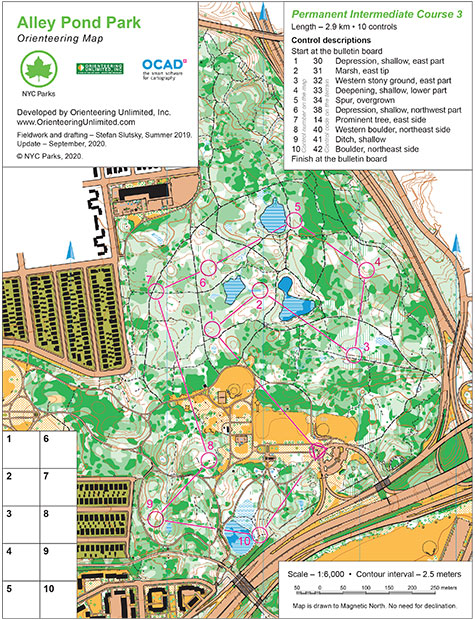
There are five orienteering courses/maps for Alley Pond Park based on skill level: Beginner 1, Beginner 2, Intermediate 1, Intermediate 2, and Intermediate 3. You may also design your own course by choosing any combination of control points in the Map with All Control Points.
Download and print the map of your choice:
Click to download and print orienteering maps
2. Head to the Start Point
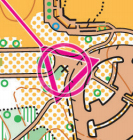
On the map, you will find a pink triangle – the start point. If the start point is the same as the finish point – as in our case – then the start/finish point is marked by a circled triangle. At Alley Pond Park, the start point is the bulletin board at the Adventure Course parking lot.
3. Find Control Points
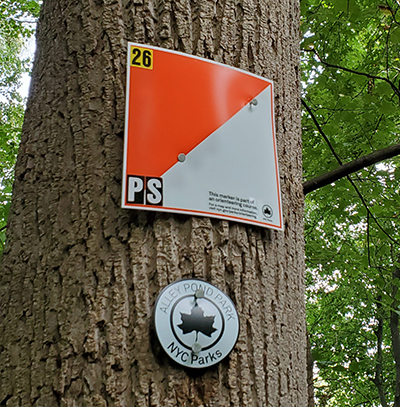
From the start point, go to each of the controls on the course in numerical order. Controls are circled and numbered on the map. The control with number 1 on the map is the first to find, and so on. A control point on the terrain (meaning in the park) is indicated by an orange and white marker.
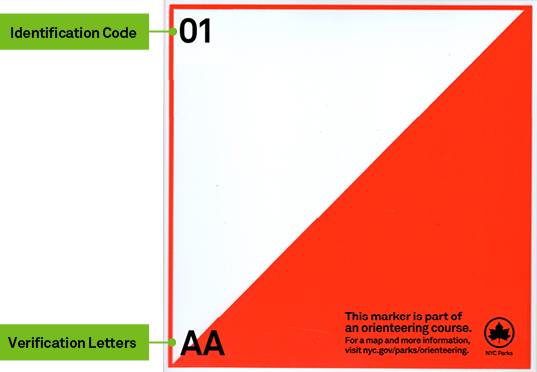
Each marker has an identification code (or simply "code"). In the case of Alley Pond Park’s permanent course, the controls are coded by numbers ranging from 1 to 55. These codes are displayed in the top-left corner of the actual orange and white markers on the terrain (in the park).
Control Descriptions
To better locate the controls and verify that you found the correct control point, use the "Control Description" on the map." The " Control Description" includes the controls' codes (displayed in the top-left corner of the actual control marker on the terrain), which side of the feature the control marker is located on, the size of the feature, which of the similar features within the pink circle the control is located on, and other additional information about the feature.
If you find a control point marker on the terrain and compare its code with the ones printed in the "Control Description" on the map, you will know whether or not you’ve found the correct one. Keep in mind – on the terrain, there are control point markers that may not belong to your course.
4. Verify Proof of Arrival
In the bottom-left corner of each control marker on the terrain, you will find the verification letters – a combination of one or two random capital letters. To prove you have found the correct controls, write the controls' verification letters in the corresponding numbered boxes on your map.
Upon completing the course, you may access the Master Code Sheet – the complete list of control codes and corresponding verification letters. If the verification letters in the boxes on your map match the ones on the Master Code Sheet, it will prove that you found all the correct controls.
How to Use Orienteering Maps
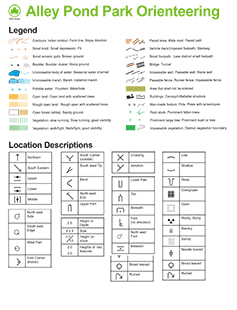
On the map, there are various colors, lines, and shapes that describe the terrain, and if you are using the Map with All Control Points, control points are described by various icons (instead of text descriptions) that describe the features at a control point and where to look for them.
Download the Legend and Icon Sheet to use while navigating the course
Directions
Although not necessary, you may use a compass as a navigational tool to correctly rotate (or orient) your map and to ensure you're heading in the right direction. Our map is oriented to Magnetic North and also includes a series of parallel blue lines.
Glossary of Orienteering Terms
- Control points or controls – a series of locations marked on the course map with a pink circle and number
- On the terrain – physically in the park
- Identification code – one- or two-digit code in top-left of control point marker used to verify it is the control point you’re looking for
- Verification letter(s) – one- or two-letter code in bottom-left of control point marker used to verify proof of arrival
Orienteering Techniques and Best Practices
Use the following techniques to improve your navigation skills and map-reading performance:
Map Folding – Orienteering maps are usually too bulky to comfortably carry in one hand while running through the woods, so you should fold your map down to a size that easily fits in your hand. Seasoned runners recommend always keeping your map folded in such a way that both your current location and your next destination are visible.
Thumbing – Instead of a GPS, use your thumb of your map-holding hand to mark your location on the map. As you run through a course, adjust the position of the thumb so that it is always pointing to your current position on the map.
Orienting the Map – Rotate the map until the symbols/lines on the map are aligned with the corresponding objects/linear features of the terrain. Alternatively, rotate the map until the arrows on the map point in the same direction as the northern end of a compass’ needle. As you move through the course and change your direction, do not rotate the map relative to the terrain, but rather "rotate" yourself around the map, so what is ahead of you on the terrain is also ahead of you on the map.
Using “Handrails” – Although the shortest route between two points is a straight line, it is usually not the best route. Instead, look for features like trails, paved paths or roads, fences, or edges of the forest that you can follow toward your destination. You may end up following several handrails en route to your destination.
Using “Attack Points” – Find on the map an easily recognizable feature (trail crossing, path junction, large boulder etc.) located just prior to your control point. Navigate to that feature and when you reach it, proceed slowly to the actual control point (or control).
Collecting Features – Look for features along the route that you can use to check off your progress toward the control point.
Catching Features – Look for a feature that will let you know that you have gone past your destination. This might be for example a trail intersection just past your control site.
Additional Orienteering Opportunities
There are orienteering clubs in many countries. Locally, there are three clubs that hold events on many weekends throughout the year.
- Hudson Valley Orienteering (HVO)
- Long Island Orienteering Club (LIOC)
- Western Connecticut Orienteering Club (WCOC)
- US Orienteering organization (OUSA)
- International organization (IOF)
This map and course were designed by Orienteering Unlimited.
